
Use this Shortcut to Create Custom Fields in Google Data Studio
Reporting is only useful if your stakeholders understand what they’re reading. We love using CASE formulas to create fields that make data easier to read or put data into context.
CASE formulas are one of the handiest functions in Google Data Studio. The only problem is that they are a pain to write if you have a ton of fields. Luckily, if you can put your fields into a spreadsheet, you can turn them into a CASE formula in a few simple steps. Here’s how:
Step 1: Create a Spreadsheet to Build your Formula
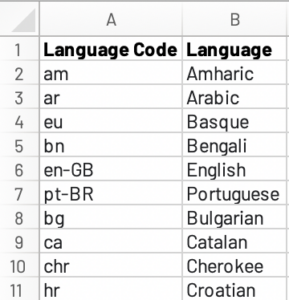
Create a sheet with two columns. Add all the data as they currently are in Column A. Add the data as you want them to be in Column A.
For example, we have used this to create a custom field for reporting user language by transforming the language codes measured in Google Analytics.
Note: If you are on the page because you want to change language codes to language names, you can copy our language code CASE formula here.
There are 57 language codes, so typing each line manually would take a long time. Here’s what that sheet looks like.
Step 2: Copy Our Formula and Update the Field you Want to Transform
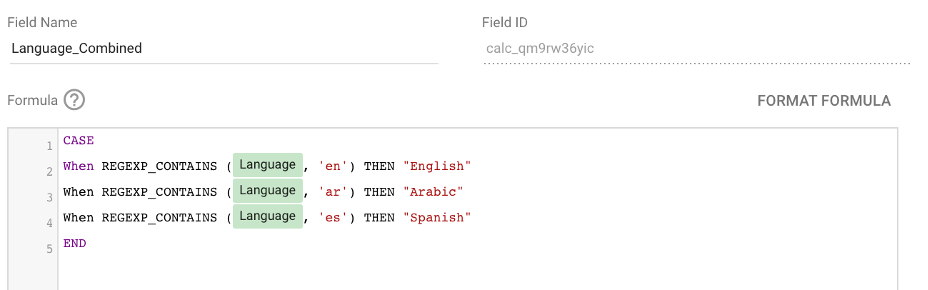
Create a new column called Formula in Column C. Paste the formula below into cell C2. Replace “LANGUAGE” with the name of the existing field you want to transform. In this example, we are transforming data from the Language dimension pulled in from Google Analytics; therefore, this field is included in the spreadsheet. If you use the correct field, it will show up as a green block when you paste the CASE statement into Data Studio.
=CONCATENATE(“WHEN REGEXP_MATCH”, “(Language, “, CHAR(34),($A2),CHAR(34), “) “, “THEN “, CHAR(34),($B2),CHAR(34),)
This is how it will look in the spreadsheet. What appears in C2 is a CASE statement.

Copy this formula down Column C to create the CASE statements for each field.
Step 3: Create a New Field in Google Data Studio and Name Your Field
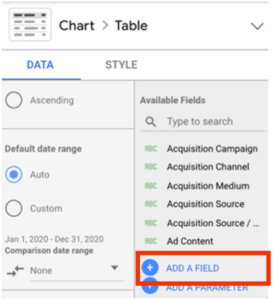
Click the Add a Field button at the bottom of the available fields list.
Step 4: Insert the Formula From Your Spreadsheet
Type CASE, then paste in the CASE statements you created with the CONCATENATE formula, then type END.
Step 5: Start Using Your Custom Field
Save your field and use it to create awesome reports that your stakeholders will actually use!
Want more help with marketing and data analytics? Let’s chat!
